Nahimic: Uninstalling & Blocking MSI Bloatware
Want to just completely uninstall Nahimic? Skip to the current instructions.
Is Nahimic malware or bloatware?
Like many MSI motherboard customers I’ve found a strange piece of software popping up on my computer called Nahimic. MSI touts this as some kind of breakthrough in audio being bundled as bloatware, but as far as I can tell many would call it malware due to its behavior.
This comes as a suggested driver update that Microsoft Windows Update will install automatically.
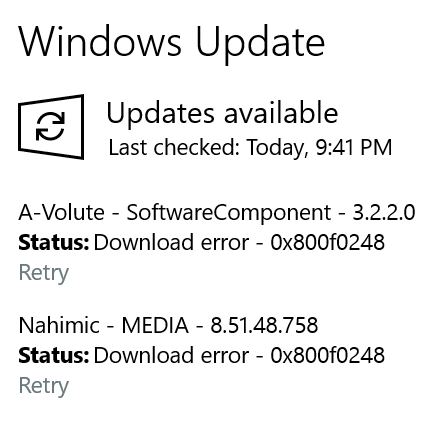
Installation Started: Windows has started installing the following update: Nahimic - MEDIA - 8.51.48.758
Installation Started: Windows has started installing the following update: A-Volute - Extension - 1.1.32.62690
When installed through a Windows update the software does NOT come with any mechanism to uninstall it. Nahimic will also re-install itself via a helper service upon reboot if you simply delete its executables. Furthermore if the helper service is disabled, executables are deleted and drivers are uninstalled, Windows will immediately reinstall Nahimic on the next update. Is this essentially malware behavior? You tell me.
Apparently there are several other ways you might be getting Nahimic. Some claim MSI bundles it with Dragon Center and apparently you can install it from Microsoft’s store. I hear the Dragon installed version is similarly insidious, but I imagine the store would let you uninstall it. I use neither, so I can’t confirm.
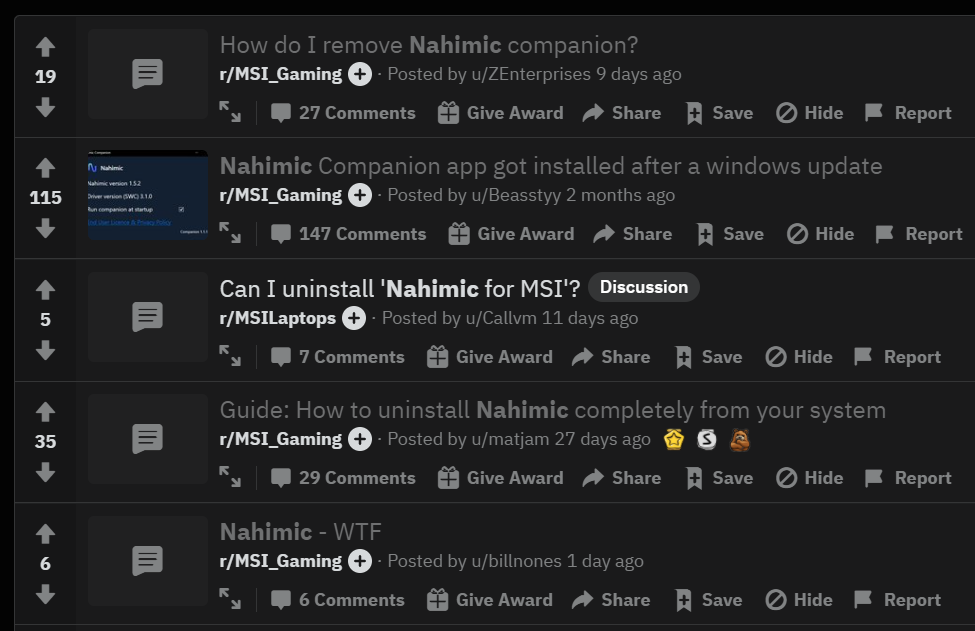
I initially checked out a reddit guide thread which you can see in the earlier screenshot, but found it really didn’t stop this behavior. The next update would simply re-install this Nahimic garbage, which could be tested by simply checking for updates. Another user suggested using group policy and linked to some documentation. I was successful with this method and sent the original poster a screenshot, I believe he has or will update the thread.
Steps to Disable Nahimic
Before we get started:
You will need to be a user with Administrator privileges. You will also need to pay attention to Windows Home vs. Pro/Enterprise instructions as they diverge in the guide.
Stopping Nahimic Helper Service
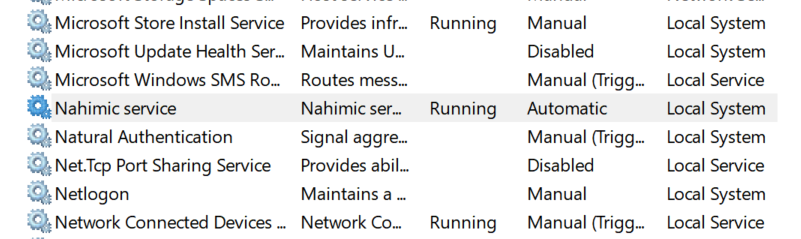
First we need to open the Services application which manages Windows Services. This can be done by typing “Services” in the start menu search or by running services.msc by right clicking on the Windows logo of the start menu button and selecting “Run”. You will see a new screen, scroll down and find the Nahimic Service.
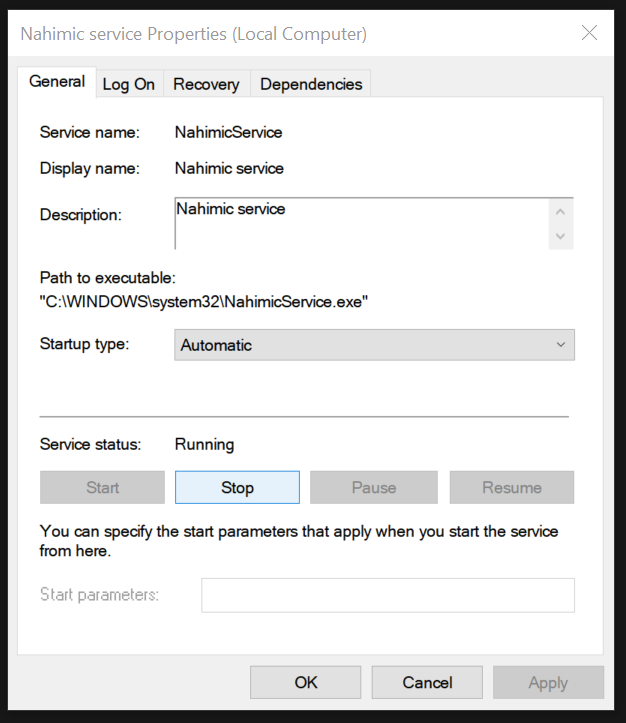
Double click on “Nahimic service” and press the Stop button.
Then select “Startup type: Disabled”. and click Apply, then OK.
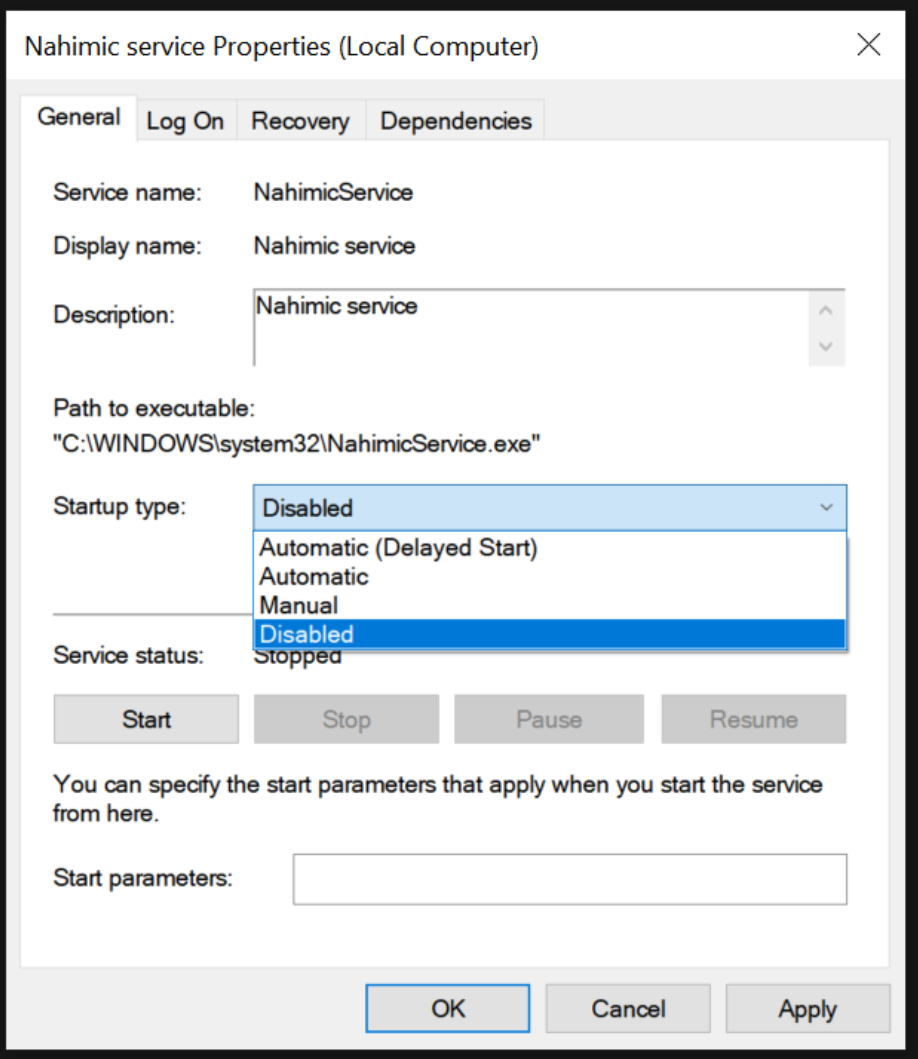
This will keep the service from messing with us while we work.
Killing Processes
The prior step should kill off Nahimic processes, but just in case we can double check. Open up Task Manager, which you can find in the start menu search bar, by right clicking on the windows logo of the start menu, or pressing Ctrl+Shift+Esc.

The two highlighted processes, if they exist, should be killed. Select them and press the “End task” button or right click and select “End task”.
Blocking Future Installations
This is where paths start to diverge. Pro users of Windows operating systems will be able to implement a much more robust solution than Home users to block future installs. Home users can try various tutorials online to install Group Policy Editor, and follow the Pro instructions, but this is not guaranteed to work.
Instead Home users can use a different solution that will at least prevent the same version of Nahimic from installing itself, which will require you to follow these steps whenever a new version of Nahimic comes out.
Windows 7/10 Pro & Enterprise Edition Instructions
Uninstalling Devices & Drivers
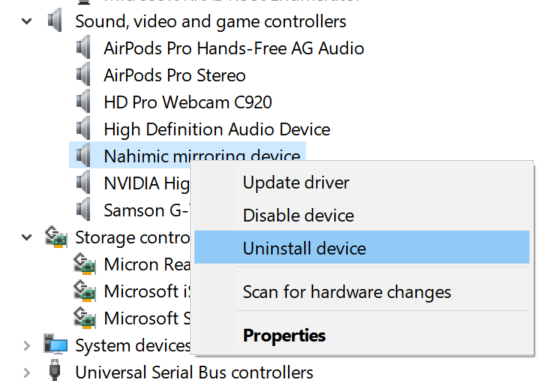
Type “Device Manager” into your search in the start menu or browse to it in the Control Panel. In this screen there are two drivers we’re interested in, the first is the “Nahimic mirroring device” found under “Sound, video and game controllers” section. Right click on it and select “Uninstall device”.
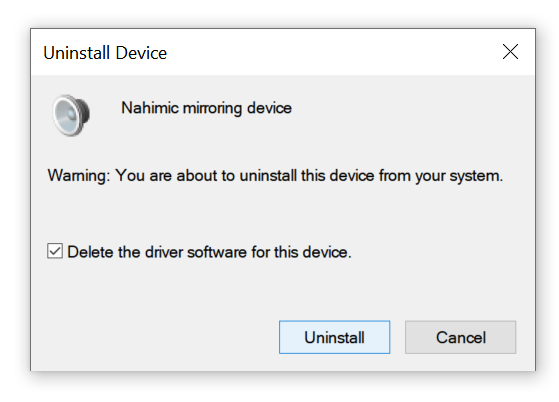
A new prompt will open, make sure to check “Delete the driver software for this device.” before clicking Uninstall.
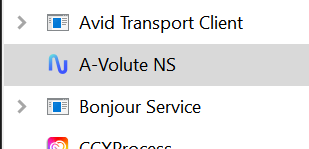
Now you will do the same for the A-Volute device found in Software Components -> A-Volute Nh3 Audio Effects Component. Right click on it and select “Uninstall device”. Make sure “Delete the driver software for this device.” is checked and click Uninstall.
Use Driver Store Explorer to Delete Remaining Drivers
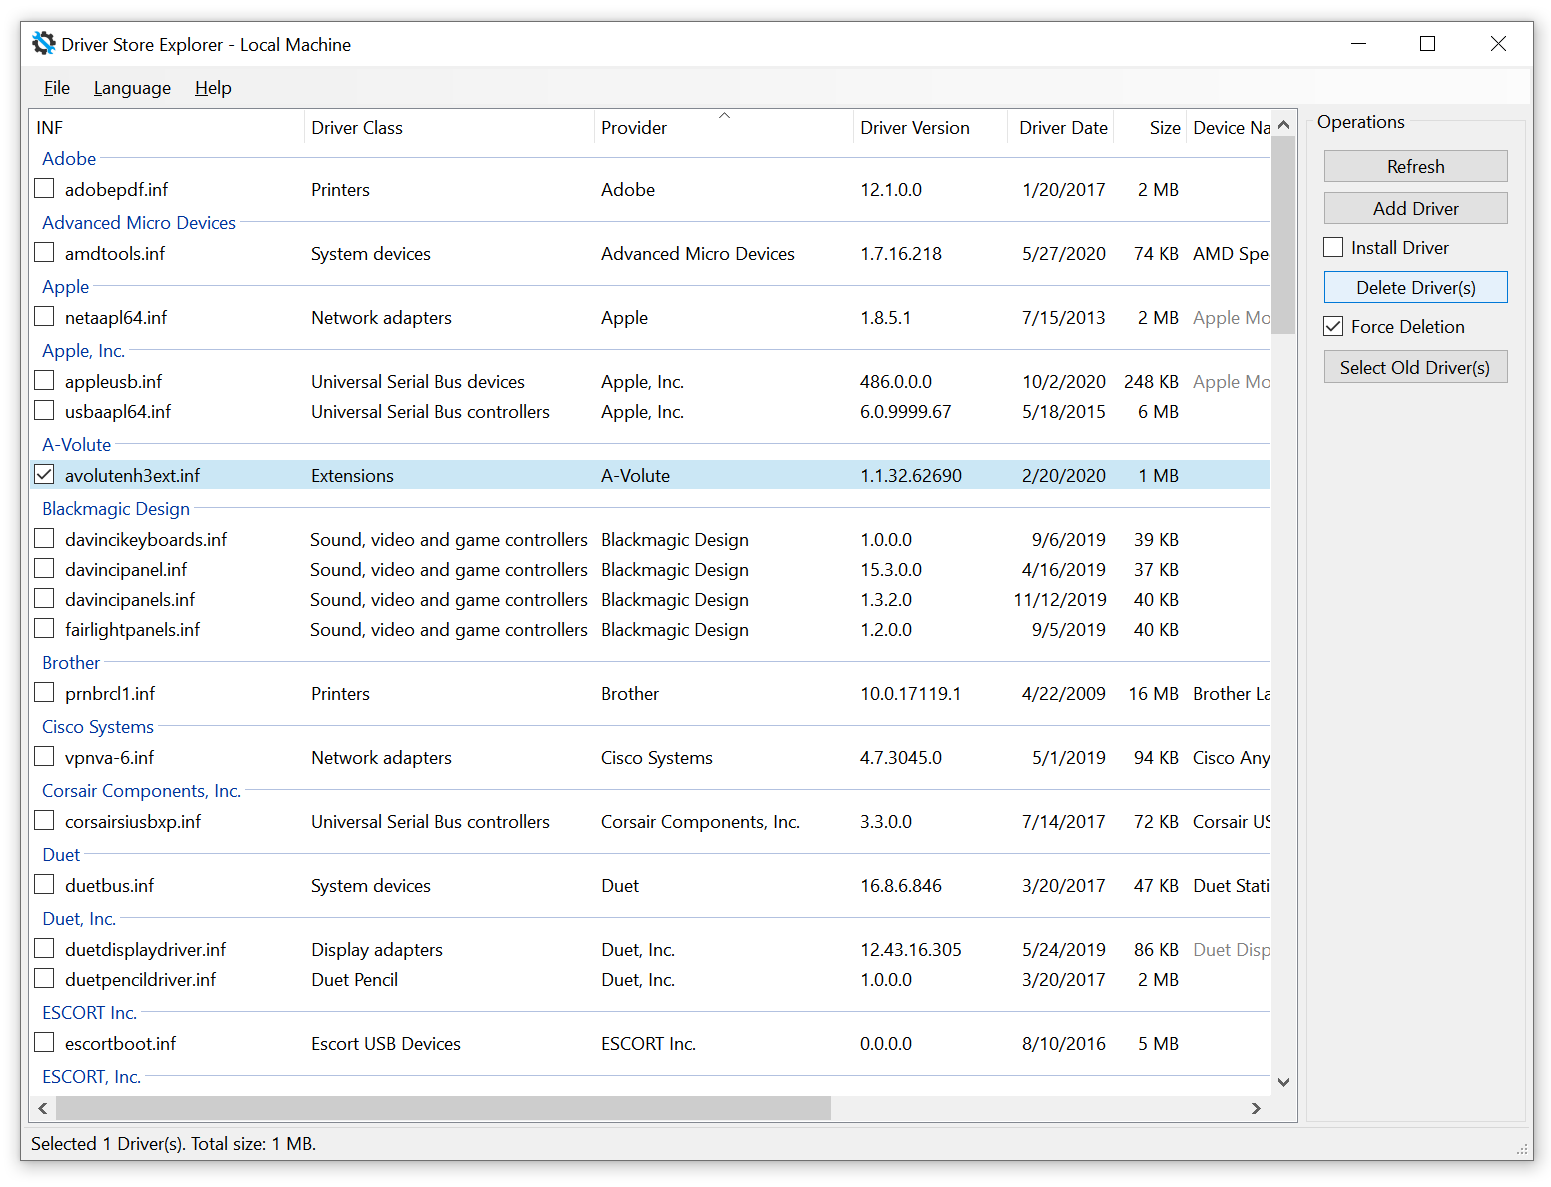
You should download this very nifty tool made by Teddy Z (lostindark) called Driver Store Explorer and unzip it somewhere on your computer. Now open up that folder and run it by double clicking on Rapr.exe. You should get a screen like this:
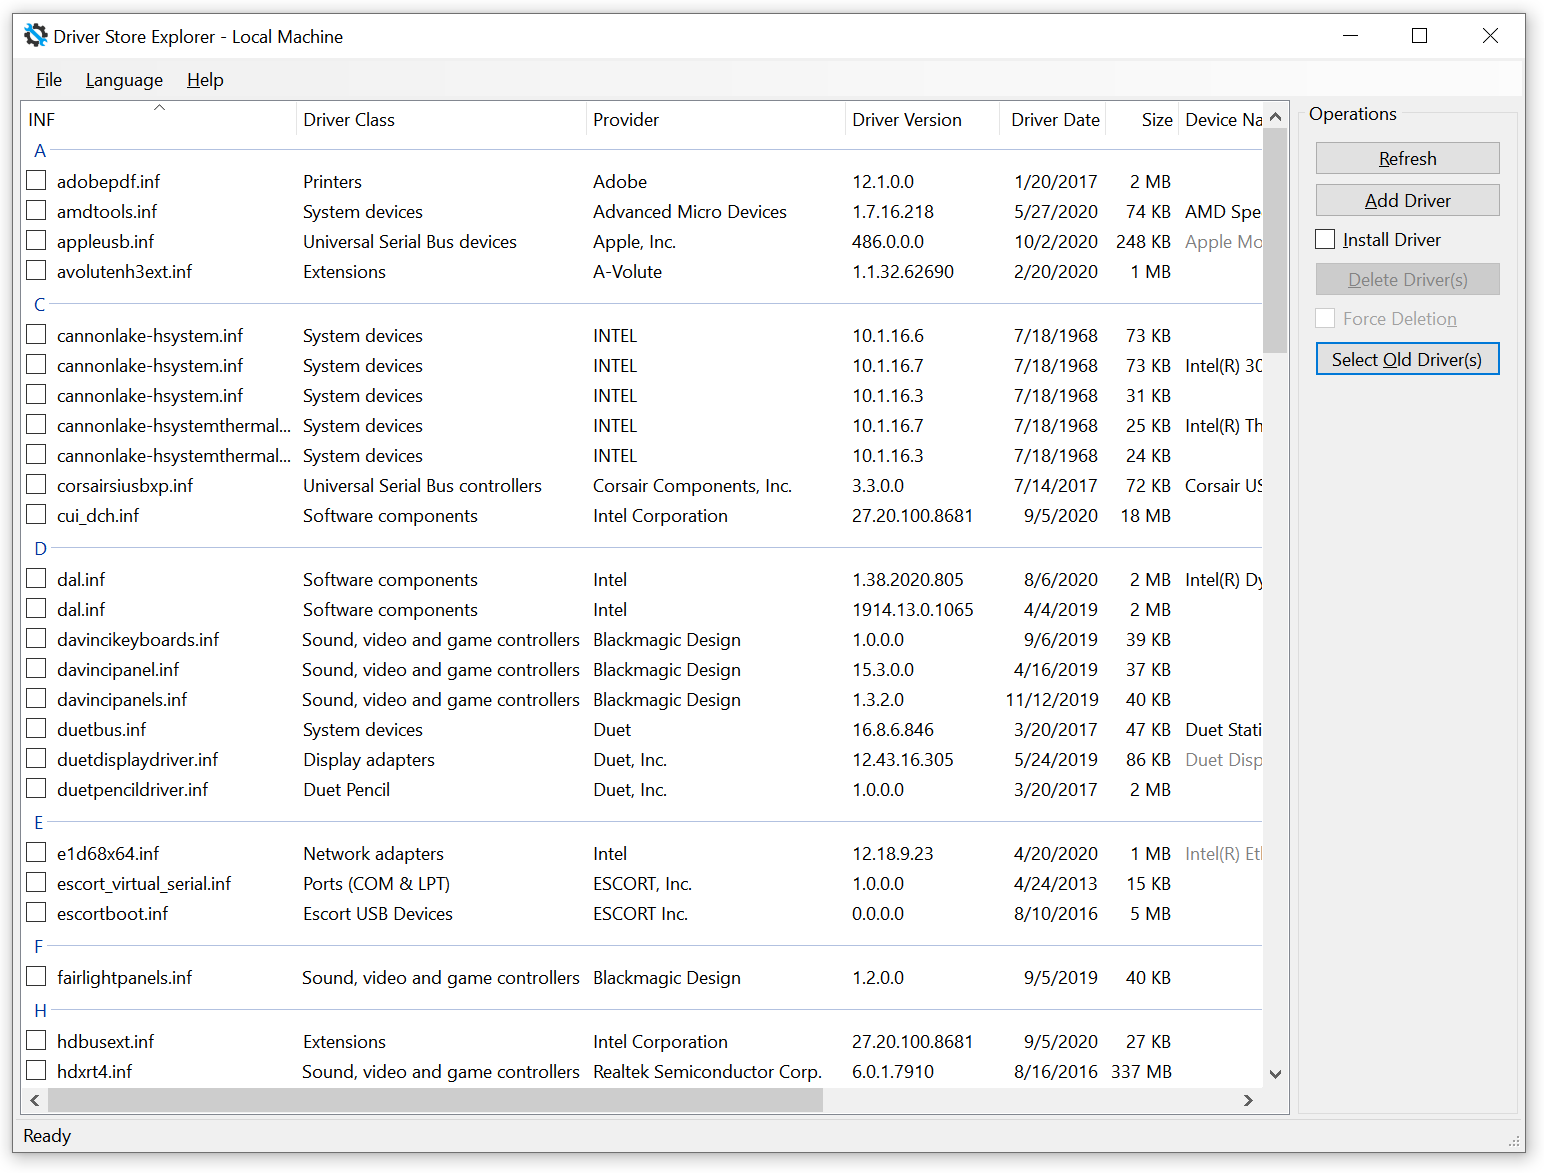
Here you should look for any entries from A-Volute or Nahimic. In my case I see that there is a leftover A-Volute inf file. I’m going to tick its checkbox and then tick the “Force Deletion” checkbox on the right panel and click “Delete Driver(s)”.
A box will ask you to confirm, you should go ahead and do so.
Blocking Nahimic Installs With Group Policy
Group policy is a feature available to Pro and Enterprise users which allows you to create custom rules for how Windows behaves. This is typically used in professional environments where such rules are important to the workloads, security, compliance, automation, and other concerns of a specific organization.
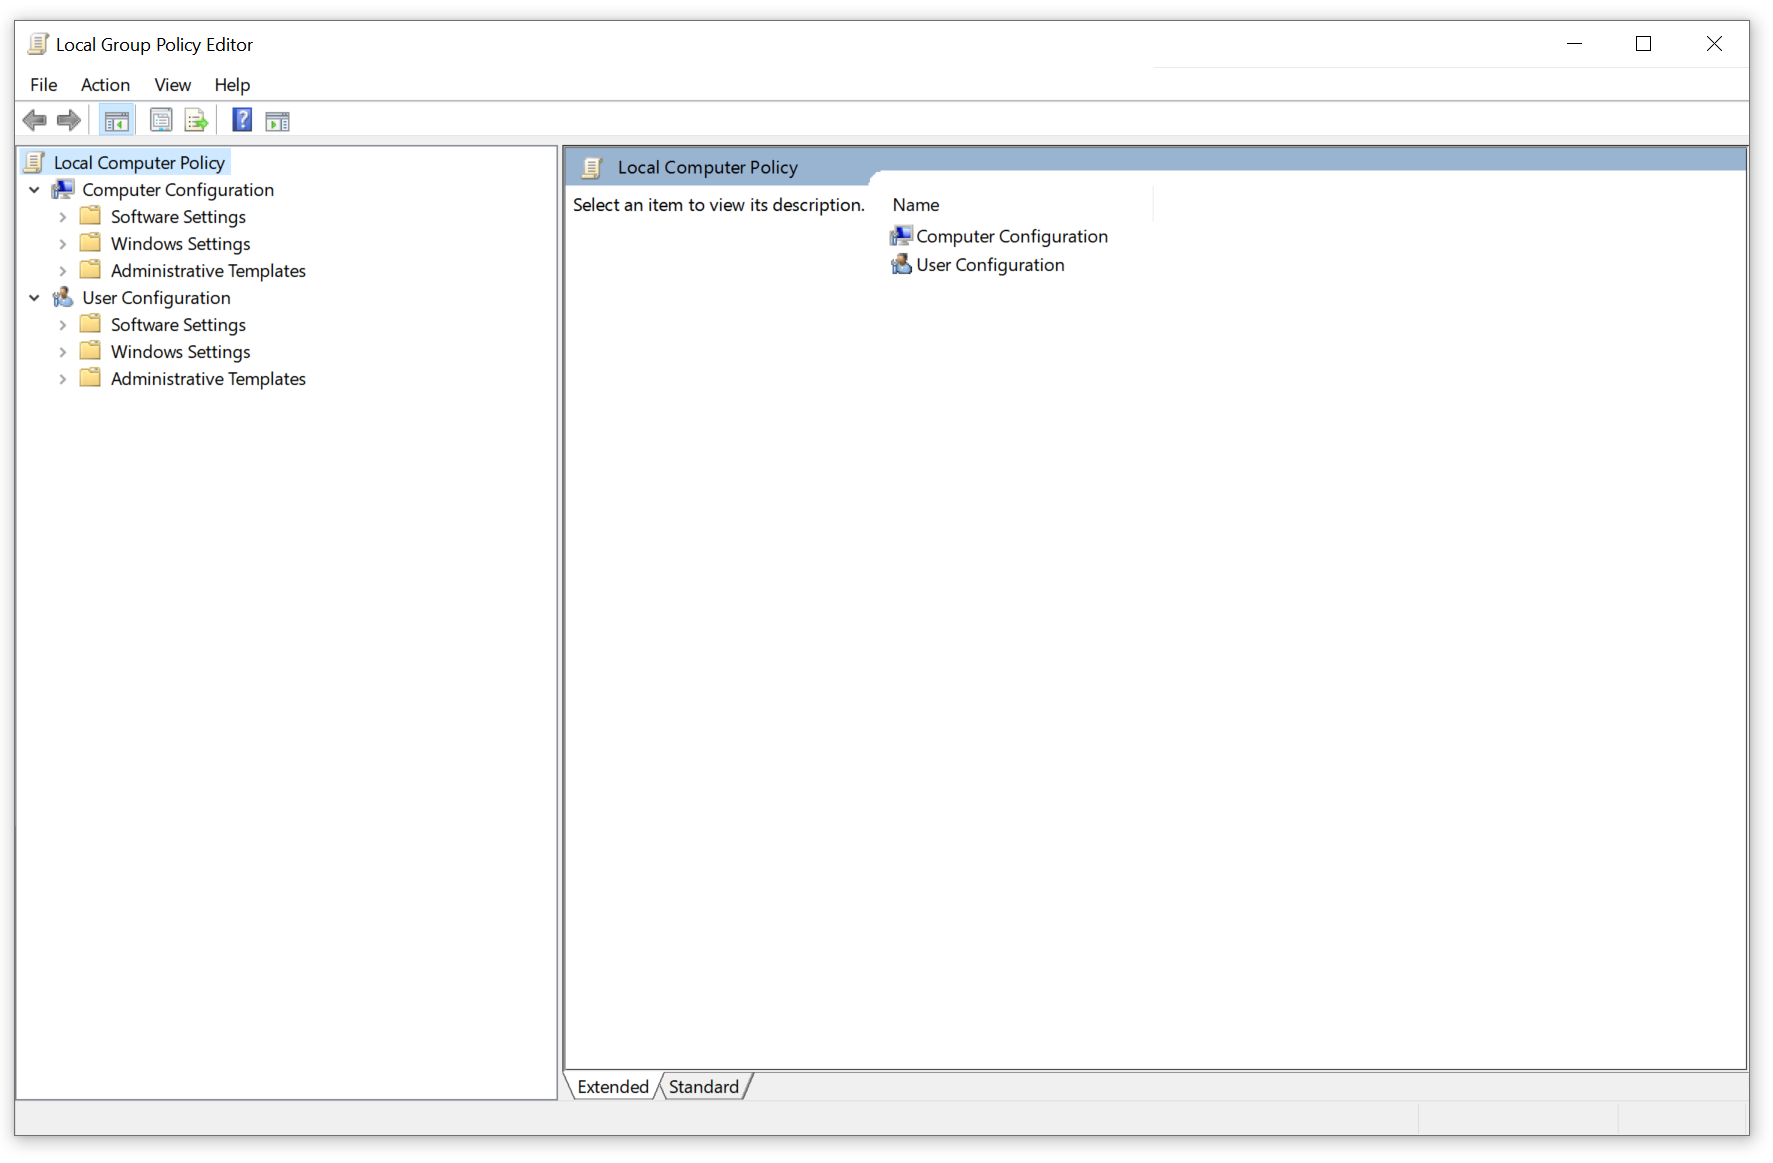
We will leverage this functionality to prevent Nahimic from infesting our systems. First you need to launch the policy editor, type “Edit group policy” into the start bar search and select it. Alternatively right click on the Windows logo of the start menu and select Run and type gpedit.msc.
With the policy editor open select Local Computer Policy -> Computer Configuration -> Administrative Templates -> System -> Device Installation -> Device Installation Restrictions.
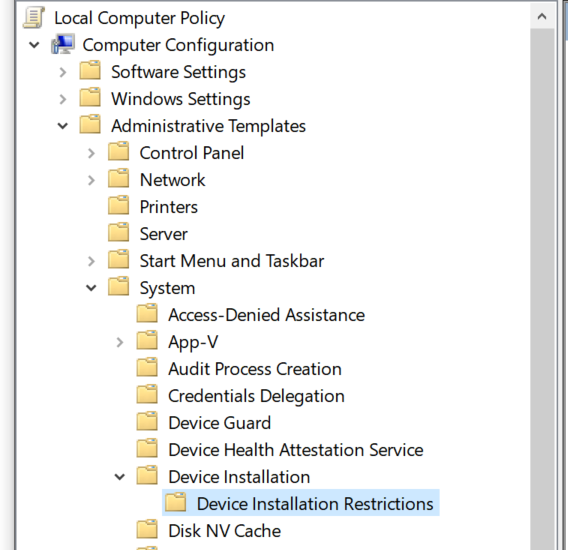
Once you’ve clicked on the Device Installation Restrictions section you can now see a list of policy settings on the right side. You should select the “Prevent installation of devices that match any of these device IDs” policy and double click on it. A new window should open.
In this new window you should select the “Enabled” radio button on the left side and tick the “Also apply to matching devices that are already installed” checkbox on the left bottom.

Now click the “Show…” button which will open a new prompt. Here you can enter Device IDs line by line. Enter the following two device IDs:
ROOT\Nahimic_Mirroring
SWC\VEN_AVOL&AID_0300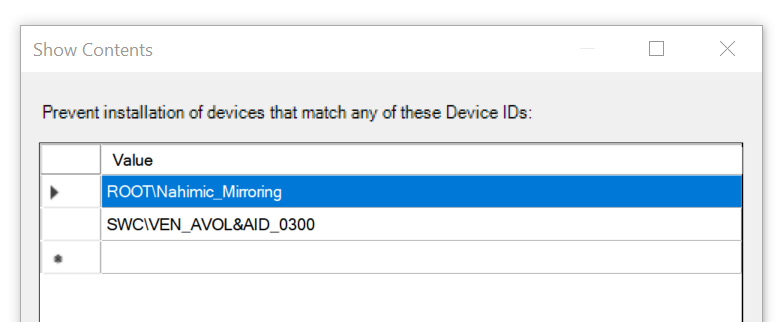
Then click OK to close this prompt. Click Apply in the previous prompt and then OK.
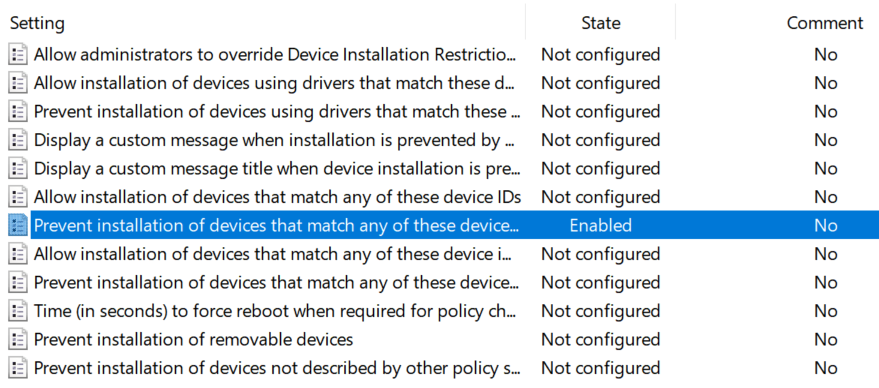
You should now see that the policy is Enabled. Congrats, if you did all of this correctly devices with matching Device IDs should no longer be installable. You can now continue on to the cleanup section of the guide.
It is possible those IDs may change in the future. The way I found the IDs was to look at the properties of the two drivers we’re disabling in Device Manager. There I was able to get at the “Hardware Ids” (which are the Device IDs) from the Details tab.
Windows 7/10 Home Edition Instructions
Disabling Devices & Drivers
Type “Device Manager” into your search in the start menu or browse to it in the Control Panel. In this screen there are two drivers we’re interested in, the first is the “Nahimic mirroring device” found under “Sound, video and game controllers” section. Right click on it and select “Disable device”.
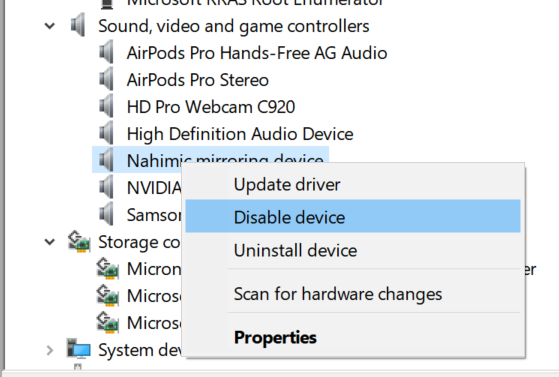
A prompt will ask you to confirm and you should do so. Now you will do the same for the A-Volute device found in Software Components -> A-Volute Nh3 Audio Effects Component. Right click on it and select “Disable device”.
Why do we disable devices instead of uninstalling them along with the drivers like Pro users? Because we’re not able to use Group Policy Editor to create a policy to block future installations. By leaving the devices and the service disabled Windows will think everything is fine during updates.
Unfortunately when a new version of the Nahimic software comes out, it is likely Windows will update and re-enable all of this. So far I’ve seen one such update in the last 4-5 months. Much better than every 24 hours!
Cleaning Up Loose Ends
We will now perform some final cleanup tasks and then give the computer a reboot.
Deleting Registry Entries
Nahimic has created a bunch of registry entries which we can now remove. In your start menu search type “Registry Editor” and open it. Alternatively right click on the Windows logo of the start menu and type regedit.exe.
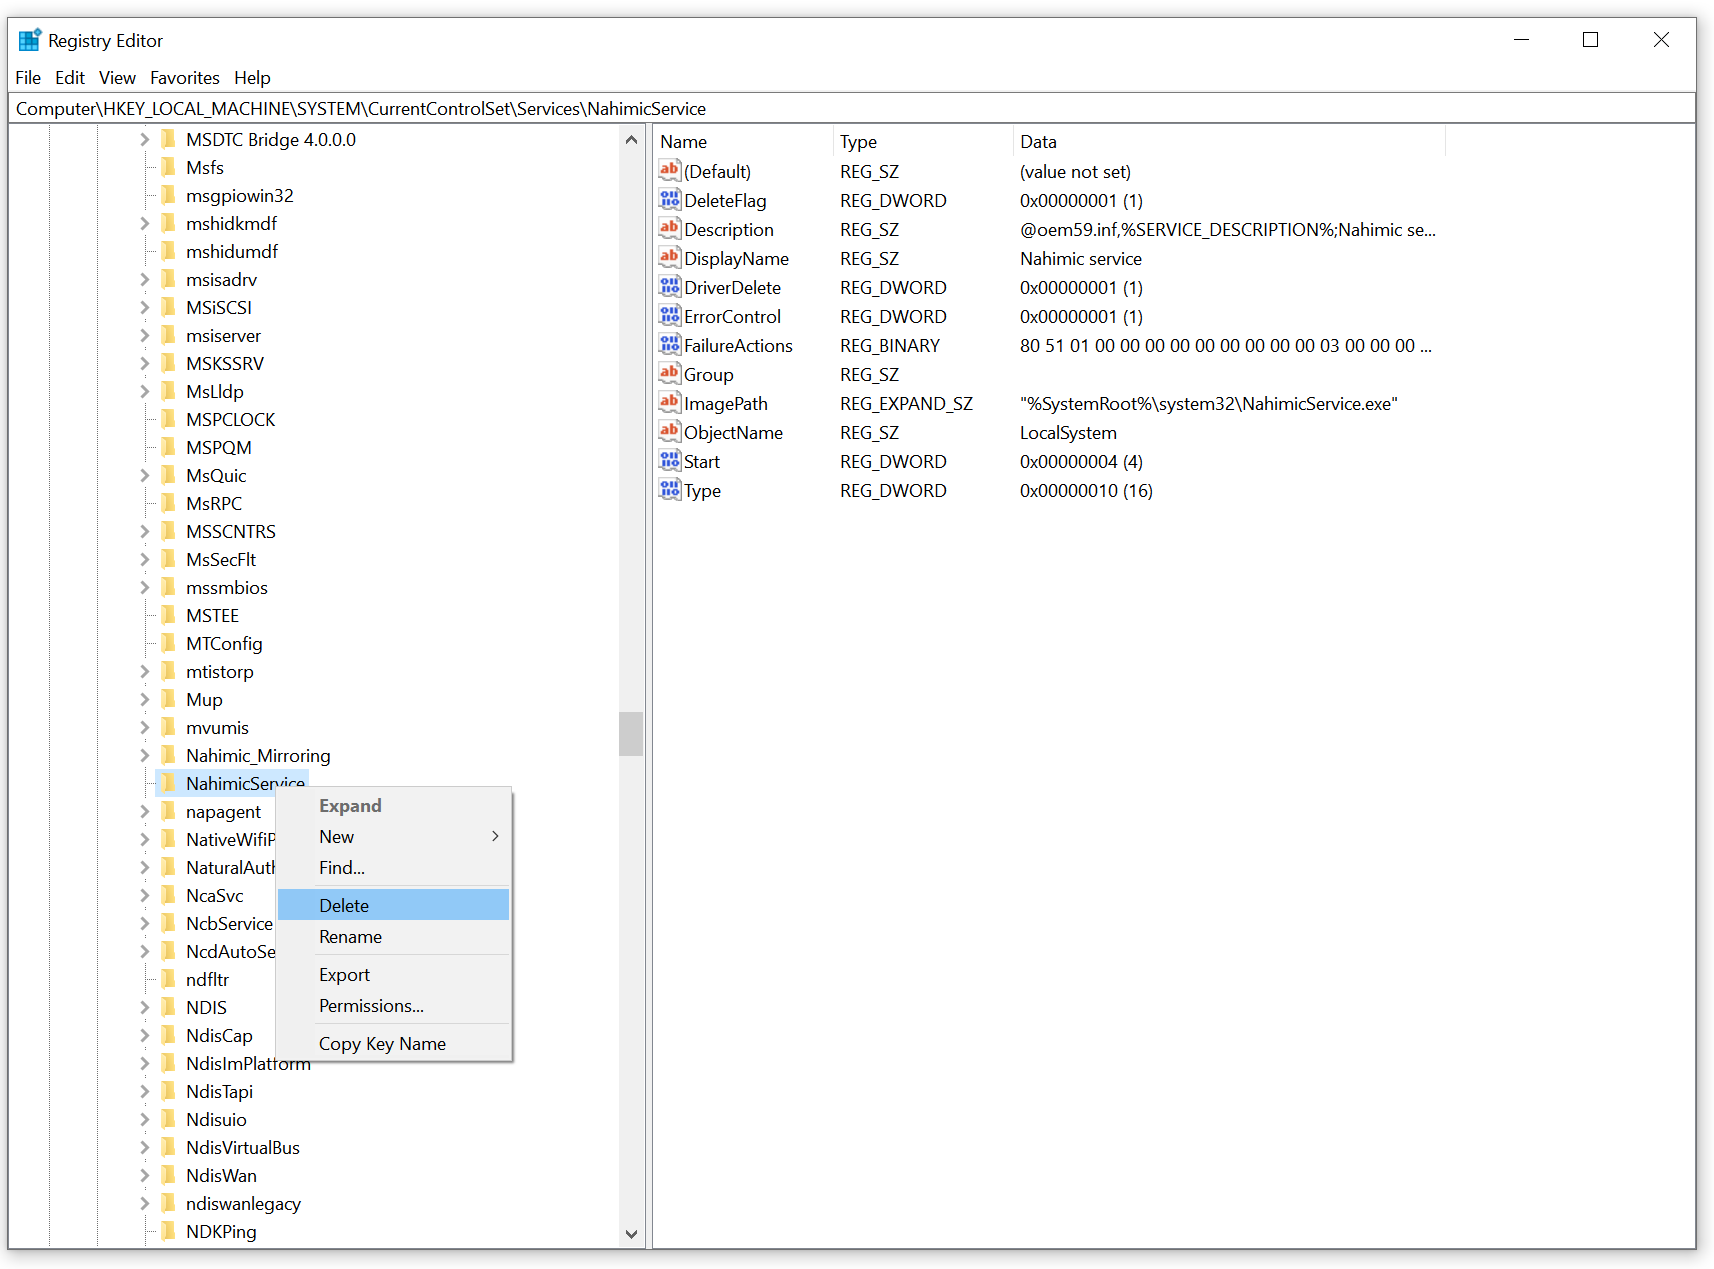
Computer\HKEY_LOCAL_MACHINE\SYSTEM\CurrentControlSet\Services\NahimicService
Computer\HKEY_LOCAL_MACHINE\SYSTEM\CurrentControlSet\Services\Nahimic_Mirroring
Computer\HKEY_CURRENT_USER\SOFTWARE\A-Volute
We want to delete the entries listed above. Select the first entry and paste it into the path block at the top of the Registry Editor, then press Enter. Now right click on the “NahimicService” entry on the left side of the screen and select Delete. Confirm that you want to do this when prompted.
Now do the same for the other two entries.
Deleting Stale Files
Nahimic has written files on your file system and it is worth deleting the following to avoid executing them:
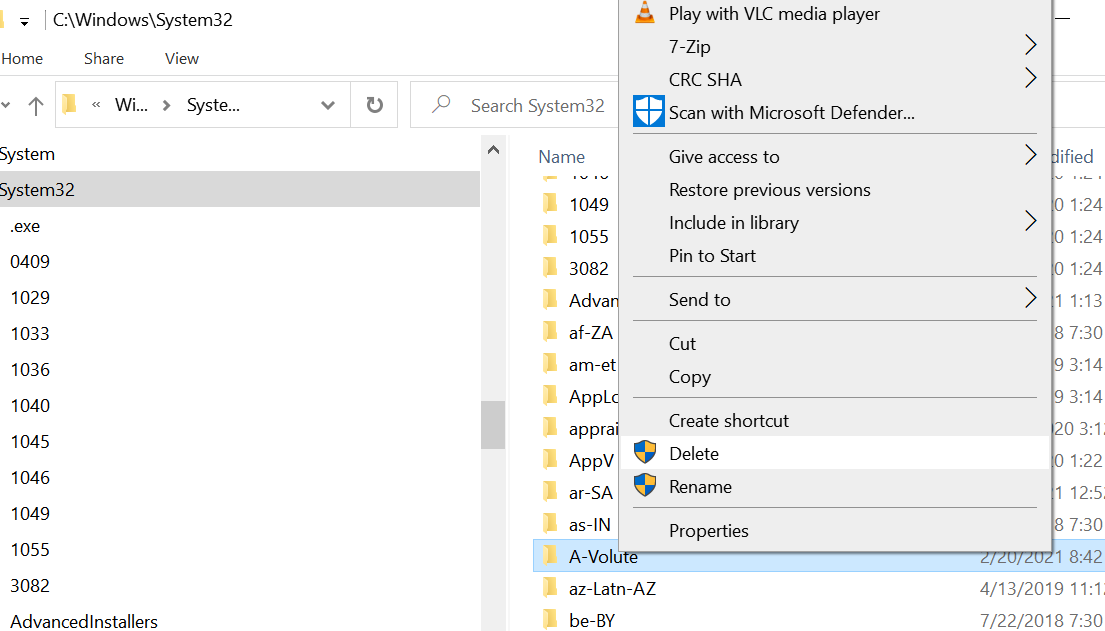
C:\Windows\System32\A-Volute
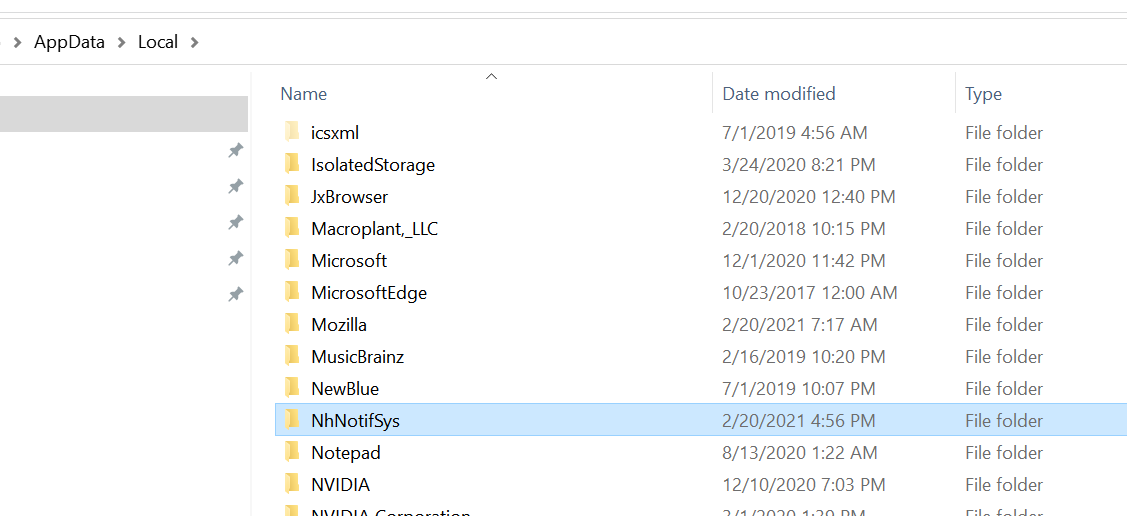
%LocalAppData%\NhNotifSys
To do this fire up File Explorer which is the normal Windows file manager. You can also click on the “This PC” icon on your desktop. You can navigate to the first location by browsing to C:\Windows\System32. Select the A-Volute folder and delete it.
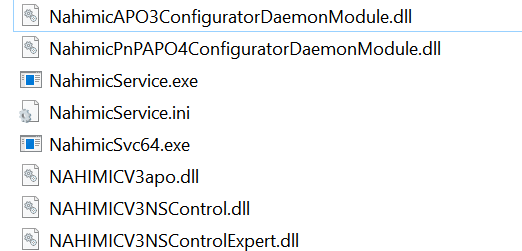
There may also be other nahimic files in System32 such as C:\Windows\System32\NahimicService.exe which may also be worth deleting. If you’re following the Pro/Enterprise instructions typically the steps had removed those files so you may not find them.
Now if you type %LocalAppData% into your File Explorer path field you will be directed to your users Local Application Data folder. Here you can delete the NhNotifSys folder.
Reboot Your Computer & Run Windows Update
You should now reboot your computer. Once it’s back up run Windows Update. After it checks for updates you should verify that Nahimic is still gone. If you followed these steps it should be entirely absent from your system and blocked from future installs.

Windows Home users aren’t quite as lucky as future versions of Nahimic will get installed, but that isn’t as frequent as every windows update and provides some relief.
Conclusion
I think it’s entirely unreasonable that something this insidious is being bundled. MSI should certainly think about what it’s forcing on its customers. At this point I will definitely buy a different motherboard from their competition as this is unacceptable.
Users overwhelmingly do not want bundled software they can’t opt out of. Especially when said software launches itself out of the blue and takes over your audio. MSI is completely tone deaf with this move. Based on what appears to be a Nahimic rep’s posts on reddit so is the company that makes Nahimic.

Google Coral TPU on a KVM Guest

1TB Seagate Drive Failure
Toggle Lenovo Touchpad – Quick & Dirty Batch Script
About Author
dmitry
Add a Comment
You must be logged in to post a comment.
Hey,
I just wanted to say thank you for the very good information. It was easy to follow and it did as expected. However I’d like to add that I did in fact experience negative side effects for doing this (removing a-volute and nahemic). I also want to add that I do not own any MSI products, instead I have ASUS (Zephyrus G15 GA502IV w/ Ryzen 4900 & RTX2060). This software came installed on my gaming laptop and I didn’t think that I used it for anything. Well the truth is, I didn’t use it but my device does SOMEthing with it.
After I successfully removed all traces of this software and then blocked it from WAU reinstalling it by following this guide, I immediately noticed a difference in how my PC performs.
To be clear, most things work fine and the PC is fully usable and still lightning fast, Halo Infinite stays pinned at about 80FPS with High Graphics settings for example. The problem I experienced is related to how my device handles sound. (Which made sense because that’s what A-volute does).
The Problem:
When I start any kind of Audio/Video (excluding an actual game or regular windows sounds), for example VLC or YouTube or BitChute streaming. There is about a 80% chance that the sound will start playing and then abruptly go silent. The video will keep on playing though and if I press the keyboard Left Arrow (for rewind), the audio will restart playing. It does this ALL THE TIME now. It never did this before I removed A-volute/Nahemic software. On a positive note, it doesn’t do it if a game is playing in the background or some other audio source is already playing…. this seems to prevent the issue.
Now that I know that A-volute was actually doing something for me, I have no problems letting it run on my machine. I had thought it was useless and just taking up space. I feel like I may have noticed some sound quality degradation, or sound artifacts, but I can’t be sure if it was caused by this or just a crappy audio source.
TDLR:
Negative Effects of Removing A-volute/Nahemic service(s)= Sound often cuts out and does not restart unless I rewind video a few seconds.
I’ll be undoing the instructions above for the reasons I mentioned. However I’m no less thankful to the author of this for his efforts, it’s not his fault and I can apply this knowledge to other things. So I’ve got this page bookmarked. The main reason that I wanted to leave this comment was that it may help somebody who has a similar device as me.
Thanks dmitry!
Interesting! I really am not sure why this would affect your system. I wonder if Asus has a different implementation that somehow affects your audio driver used with that board. Thanks for leaving this comment and maybe it will help others with a similar configuration!